Farmstead: Inspiration from Our Past and the Vision of Our Future

When I was 12 years old I read my first Martha Stewart Living magazine at my Great Grandma Dea's house.  I instantly fell in love with all the beautiful things.  The perfect homes, landscapes, dinners, events, crafts, and good things completely shaped my view of what I wanted my future to look like.

Everytime I would visit Great Grandma, she would have a stash of Living magazines for me.  I ended up with a collection of them that was quite large and cumbersome to move.  Sometime between college and getting married, my collection was down-sized, only to have been built up again by a gift-subscription from my mother-in-law when we moved to Nebraska in 2005.  I now get my magazines on my Kindle, saving space in our small living quarters and hopefully a few trees.

My love for beautiful things continued to grow, and eventually I settled with Interior Design as my college major with some influence from my mother and my, then, future husband.  My first job out of college was with a nationally renowned design firm in St. Paul, Minnesota.  Many of my projects were remodels of beautiful old homes, abundant in character.

My husband's first job out of college was with a brand new home building company in Minneapolis.  His company specialized in homes that were reminiscent of early 20th century architecture and were built in the Cobblestone Lake development in Apple Valley, Minnesota.  Cobblestone Lake was part of the neighborhood development trend of recalling a simpler time, taking cues from history, front porch neighborhoods and creating a small town feel.

(Photo Credit: Pulte Homes)
 
Once again, I was changed.  I loved history, I loved homes, I loved perfection and Cobblestone Lake was a culmination of all of these things.
(Photo credit: Meadowcroft Homes, LLC) 
 
With the foresight of the housing market crash, in 2005, my husband and I moved to his hometown in Central Nebraska and began our own home building company.  We wanted to continue with our passion for new "old" homes, but needed to conform to the market, as well.  Since then, I have had the opportunity to design some beautiful homes that have that century-old appeal.
 
(Photo Credit: Oseka Homes, LLC)
 
 
(Photo Credit: Oseka Homes, LLC)
 
From the time we moved to Nebraska, we had our eyes open for the right piece of land.  We knew we wanted a barn, some animals, some crops, etc.  I wanted to create and sell beautiful things.  I wanted to celebrate harvest and share it with others.  I wanted to host parties and weddings.  The problem was we were looking for something too big, and too far away for our business to function. 
 
We waited years until we came upon Farmstead Road, and even then we didn't know what we had.  I actually didn't want to keep it.  I wanted to clean it up and sell it.  Then one night, sometime after we signed the purchase agreement to sell our existing house, I woke up in a panic.  Farmstead was ours... I mean, we were supposed to live there.  I just knew it... I felt it.  I spent the next few hours creating a layout of the land with the shop (a.k.a. barn), the house, the garden, the orchard, the playset, the firepit, etc.  After a night of no sleep, I caught Justin in the morning while he was getting ready for work, and proposed my plan.  He just looked at me and said, "You're probably right."
 
So what does our little picture of perfection mean?  The vision hasn't changed much.  I have the same ideas as when I was 12 reading my first Martha Stewart Living magazine.  We hope to build our dream farmhouse. 
(Image Credit: Me)
We've planted an orchard (and are planting 21 more trees, tonight, in fact) and we dream of inviting the public to come get baskets of fresh picked apples.  We hope to do the same with other produce, vegetables, berries and eggs.  We would like a roadside stand at the end of Farmstead Road, for our girls to sell those things.
 
We hope to create Farmstead Market, which sells, not only produce, but handmade art, décor, jewelry, furniture, clothing, linens, etc. 
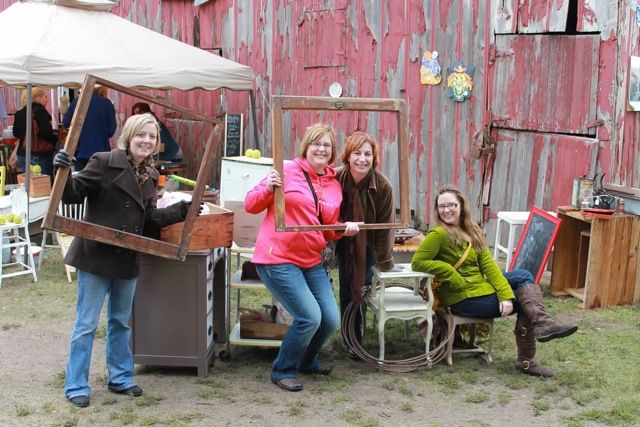
(Photo Credit: Kansas Barn Sale)
 
We would like to host parties and weddings, and other events.
(Photo Credit: Altmix Photography)
 
We hope to become more self-sufficient.  We desire to get back to a simpler time.  We want to find beauty in the little things and be grateful to God for answering prayers and blessing us with the desires of our heart.
 
We want a lot of things, I know.  And slowly, but surely, we see these things take shape.  What's most important is that we can use these things to share our story and glorify the One who's blessed us with them.
 
Happy Dreaming!
 

We planted an Orchard

We knew well before Farmstead that one of the first things we'd do when we found our land would be to plant trees, including an orchard.  We loved the idea of growing our own fruits and sharing them with others, not to mention the enjoying the beauty of the trees themselves.

So we started planting.  Our goal was 20 trees this first year.  I dug and planted the first 4 trees by myself.  The second 4, my dear mother-in-law helped.  Just when I thought I couldn't do more, Justin decided that we needed to, so we purchased 12 more on sale, and rented an auger.  The auger attached to the skid-steer was a lot more efficient.  What had taken 4 hours to plant 4 trees turned into 12 trees in 3 hours.

Digging a hole by hand.
 
Mixing in a "complete" potting soil. 
 
 The first few trees.

Finally rented the auger.
 
 The girls said they were "taking a bath".
 
We had a truckload of salvaged mulch from the 2012 Husker Harvest days delivered.  This is how we roll... lovin' the panties and muck boots!
 
20 trees...done for the year!  They are so little, you can barely see them.
 
Overall we have 17 apple trees, 2 plum trees and one pear tree.  I can't wait till these babies start producing some fruit.  I have visions of future road-side stands and farmer's markets in my head!
 
 
Happy planting!


Cucumber Woes

My cucumbers are very slow to take off this year.  Although I have plenty of blossoms, I have several babies that have shriveled on the vine.  Figuring this isn't normal, I decided to do some research. 

What I found was when you have healthy cucumber plans, but few cucumbers are actually growing or the babies are shriveling, there is most likely a problem with pollination.

These carpenter bees are trying to do their job, but they just can't keep up (here's an article on the mass die-off of bees):
 
So I think I'm going to have to give them a little help by hand pollinating some of them. 
 
{Male flower with the petals torn back}
 
{Female flower that hasn't opened yet}

Here is a YouTube video about hand pollination.
 
I also found a lot of roly poly beetles (pill bugs) feeding on my cucumber plant leaves that are near the ground and also at the base of the actual fruit.  This is a controversial subject, because many sources claim that these beetles only feed on decaying matter and that they are a part of the composting process.  I have sprinkled some Diatomaceous Earth around the base of my cucumber bed in hopes of killing them off and will check again in the evening when they come out.
 
I hope to get my cucumber woes under control, because I'd love to start making pickles soon!
 
Happy Gardening!


Dishwasher Detergent & Rinse Aid Recipe from DIY Natural

I am learning to get back to the basics.   I've pledged to limit the packaged and pre-made items that I purchase, as well as, limit the amount of chemicals and "fragrance" my family is exposed to.  Recently, I've become extremely sensitive to detergents and scents, which had me searching for more "natural" products. Those "natural" brands tend to be pricey and some even still contain "fragrance".

I've used homemade countertop spray for years, but it never dawned on me that I can do so much more.  I have officially been introduced to the world of DIY cleaning products through Pinterest and a number of blogs I follow. 

A couple weeks ago I started using a DIY dishwasher detergent that called for a couple of drops of dishsoap with a sprinkle of baking soda.  I thought that sounded nice and simple, so I tried it.  It was so-so at first, but my dishes got really scummy as the weeks went on.

So I decided to try a new dishwasher detergent recipe from DIY Natural.  It is still very simple and uses products I now stock around the house.


Soap recipe

  • 1 cup borax
  • 1 cup washing soda
  • 1/2 cup citric acid
  • 1/2 cup kosher salt (for scrubbing action)
Use 1 Tbsp per load (you can use a heaping tablespoon if you feel the need, but we do not).
Each batch yields 24 ounces of detergent. We recommend storing in a container you were going to dispose of anyway, like an old yogurt container or coffee can you can fit it under your kitchen sink. Feel free to double the batch, or multiply to create any amount you’d like.
For a DIY rinse agent, simply fill the compartment with white vinegar.

So how did it work?  Like I mentioned, I had a lot of build up from the previous recipe, so I had really put it to the test.
 
BEFORE
 
AFTER

It really did get the dishes clean.  I still had some residual water spots from the previous wash, but I think it did it's job.  I put the vinegar in the rinse agent container and I think that helps with water spots.  The half-gallon mason jar in the photo just has some condensation, but is otherwise cleaned of the milk that was in it.

I will give this recipe some time and I'm hoping this is the right combination that will bring me closer to becoming free from the chains of WalMart.

Happy Cleaning!

The Farm... BEFORE and AFTER

What was "Farmstead" like before we lived here?  One big hot mess!

There was an itty bitty decrepit house and outbuildings inhabited by stray cats, masses of junk and trash buried corner to corner, and a 1970's single-wide trailer, effectively known as the "brown turd".
Like I mentioned previously, we spent most of last summer cleaning up the junk and knocking down buildings.
 
 
We brought in the local rural fire department to do a controlled practice burn on the house and the garage.

 We built our shop with an attached apartment for our temporary living quarters.
We got some chickens and planted a garden.

 
We planted grass and put up a playset.
 
Now we are cherishing our blessings and enjoying life on the farm.  I'm looking forward to sharing more of our great adventures!


Kid's Folding Table

In our old home we had an island where we ate most of our meals, but in our temporary living space we find ourselves eating meals at this small table... even mom & dad!  It was looking pretty shabby and food was getting caught in the tears in the vinyl.  I decided that it was time to give the table a new look.


Supplies:

  • Screw driver
  • Sandpaper or primer
  • Padding
  • Laminated fabric, vinyl, tablecloth or other waterproof material.  Mine is from Material Girl, a local store.
  • Spray paint
  • Staple gun

The table is easy to disassemble with a screwdriver. Remove all of the existing vinyl.  I  removed the padding, because it was torn all the way through.  Lightly sand the existing finish of the base, or use a primer.  Spray paint the entire base.  You can tape off the plastic feet or paint them the same color as the metal.  I like the look of the painted feet.
Pull the padding tight over the board of the table and staple to the back side, rounding the corners in a pleated fashion.  Do the same with the fabric, making sure not to staple through the material.  Pull it very tight, so it is not loose or wrinkled when it is finished.  After the base has dried, screw the top back on.  And that's it... a unique, functional and attractive table.
You can do the same with the chairs, but I haven't gotten to them yet.  The chairs I had were both broken beyond aesthetics, so I purchased new ones.  They are red and blue and in perfect condition, so I don't think I will tear them apart.  I will probably sew some washable slipcovers in a coordinating fabric and will add that to this post in the future.

Happy Crafting!

An Incredible Journey

I don't even know where to begin.  I set up this blog months ago, before I even knew which direction life was going to take us.  In the end, God had a plan.  It looks like Farmstead Road is going to be our permanent home. 

In the months since the first post, we sold our house in town, built a shop at Farmstead, moved into it, planted a garden, got some chickens, planted some grass, put up a playground and are preparing to break ground on our dream home.  Farmstead Road is not only the road we live on, but our journey.


I have decided to amp up my blog and chronicle the happenings around our acreage.  From gardening to crafty projects, from home design to real food, the Farmstead Road blog is a place for others to find inspiration.

Happy travelling!